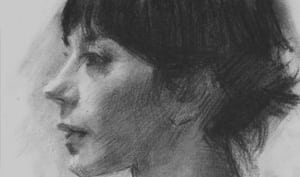
Step 10: Painting Lips – Portrait of Lisa
Painting Lips. In this stage, refine the form, anatomy, and colour transitions of the lips by carefully observing their plane structure and smaller anatomical landmarks. Accurate modelling of these elements brings the mouth to life with natural volume and expression.
- Simplify into Planes
Like other features, the lips can be understood in terms of top, front, and bottom planes:
Upper Lip
• Primarily a bottom-facing plane, making it generally darker than the lower lip.
• Cupid’s Bow – Two sharp peaks at the centre of the upper lip; forward-facing, and may catch a small highlight.
• Tubercle – The rounded, central mound between the peaks of the Cupid’s bow; projects forward and often catches light.
• Philtrum – The groove above the upper lip, made of two subtle ridges that converge toward the tubercle. Contains top, front, and side planes depending on the light angle.
• Vermilion Border – The soft edge where the coloured lip meets the surrounding skin; treat this transition subtly—never with a harsh outline.
Lower Lip
• Faces more upward, typically lighter in value than the upper lip.
• Composed of two main lobes—a larger central lobe and a smaller secondary lobe off to one side.
• These lobes create soft undulations in form, which should be carefully modelled with gentle shifts in tone.
• The highlight often falls on the centre of the larger lobe, emphasizing its rounded, moist surface.
- Oral Commissures (Corners of the Mouth)
• Shaped like butter beans, the commissures gently curve inward toward the face.
• These are small but important forms, usually darker and more recessed.
• Keep the transitions soft and natural—this area can become stiff or artificial if over-defined. - Mental Labial Furrow and Surrounding Forms
• The mental labial furrow (the shadowed groove between the lower lip and the chin) helps anchor the mouth and define the base of the bottom lip.
• It is usually a bottom-facing plane, darker in tone but with potential reflected light from below.
- Light, Form, and Colour
• Upper lip: Cooler, more muted in tone—especially in the shadow.
• Lower lip: Warmer, lighter, and more reflective.
• Add a highlight to the larger lobe of the bottom lip to suggest moisture and roundness.
• Use a mix of reds, earth tones, and neutrals—avoid pure reds to keep the lips grounded in natural flesh tones.
• Pay close attention to colour temperature shifts, especially between light and shadow. - Edges and Accents
• Keep the edges soft, especially around the vermilion border and corners of the mouth.
• Use sharper accents sparingly—a crease at the commissure, a crisp highlight, or a subtle edge under the bottom lip.
• Consider a cool reflected light just beneath the lower lip to help separate it from the chin and reinforce depth.
By observing these anatomical divisions and subtle form shifts, the lips can be modelled with richness and realism—making them expressive, soft, and fully integrated into the portrait.